How to optimise your computer for the best DAW performance
Every producer wants their system to perform at its best so they can focus on making music. Here’s how you can make sure your DAW is delivering.

Image: bymuratdeniz/Getty Images
Leading Digital Audio Workstations (DAWs) have decades of development behind them. They’re now supremely capable in all areas of audio production. Alongside these advancements, the computers we run them on have also become exponentially more powerful. But, of course, we all still run into performance issues.
What we expect of our systems has increased dramatically. It’s immensely frustrating running into bottlenecks during a creative flow when all you want to do is add that seventh instance of Omnisphere without your system slowing down. Thankfully, there are some core settings you can tweak and some concepts that are common to most DAWs and computers that will help you avoid or fix any issues. Let’s dive in and find out what they are.
Multithreading is normal now
Most computers’ CPUs have, for many years, used multiple cores and within those, multi- or hyper-threading to maximise computing power, splitting complex tasks across multiple cores. All DAW developers have written their applications to use this, and it’s generally switched on by default.
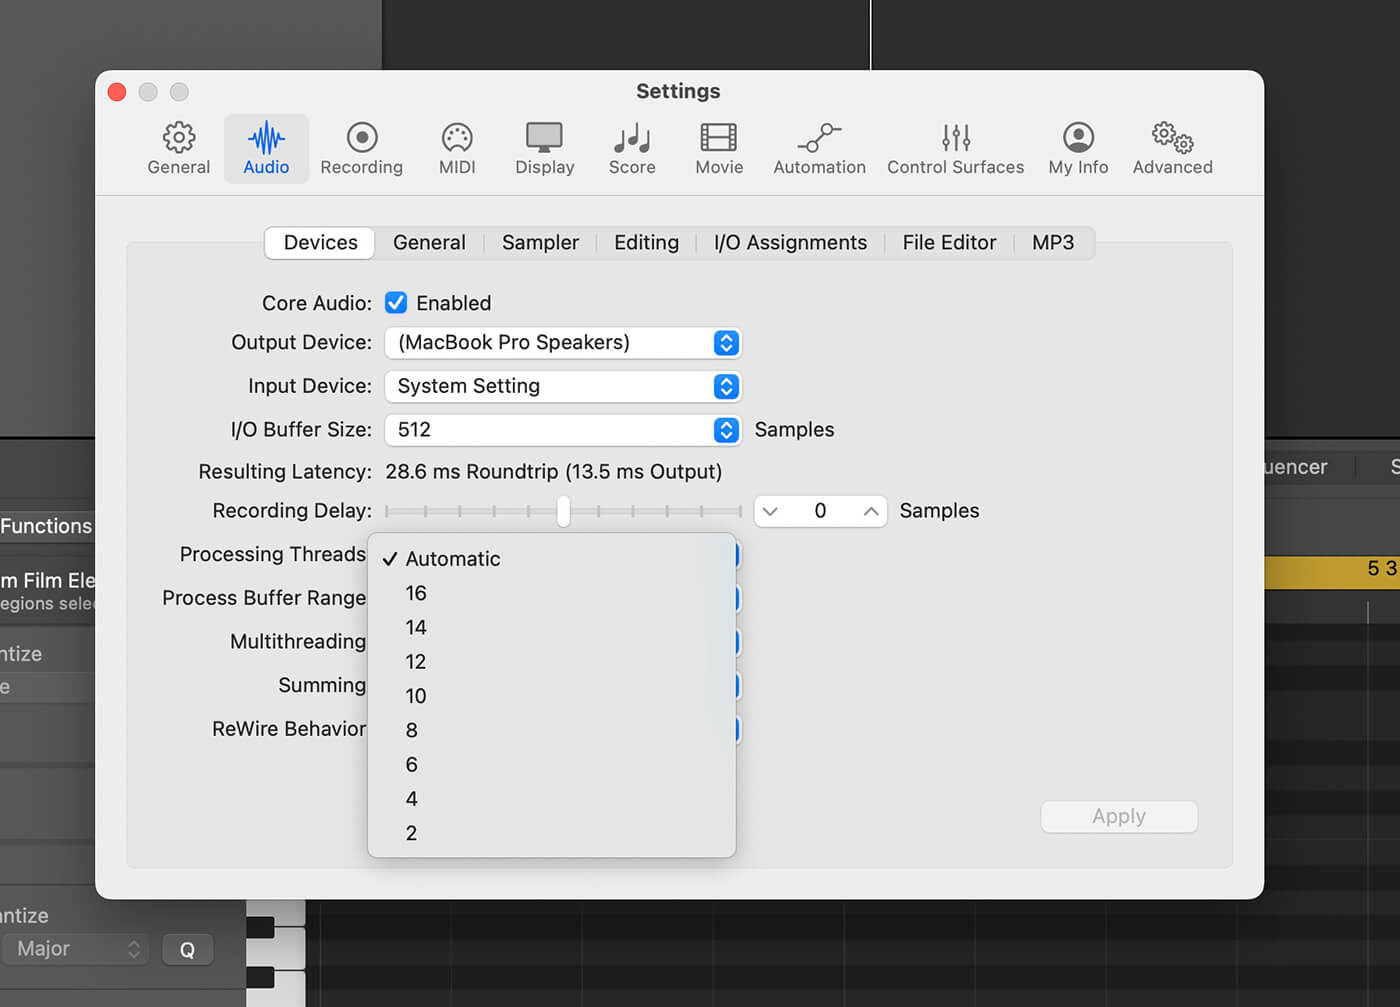
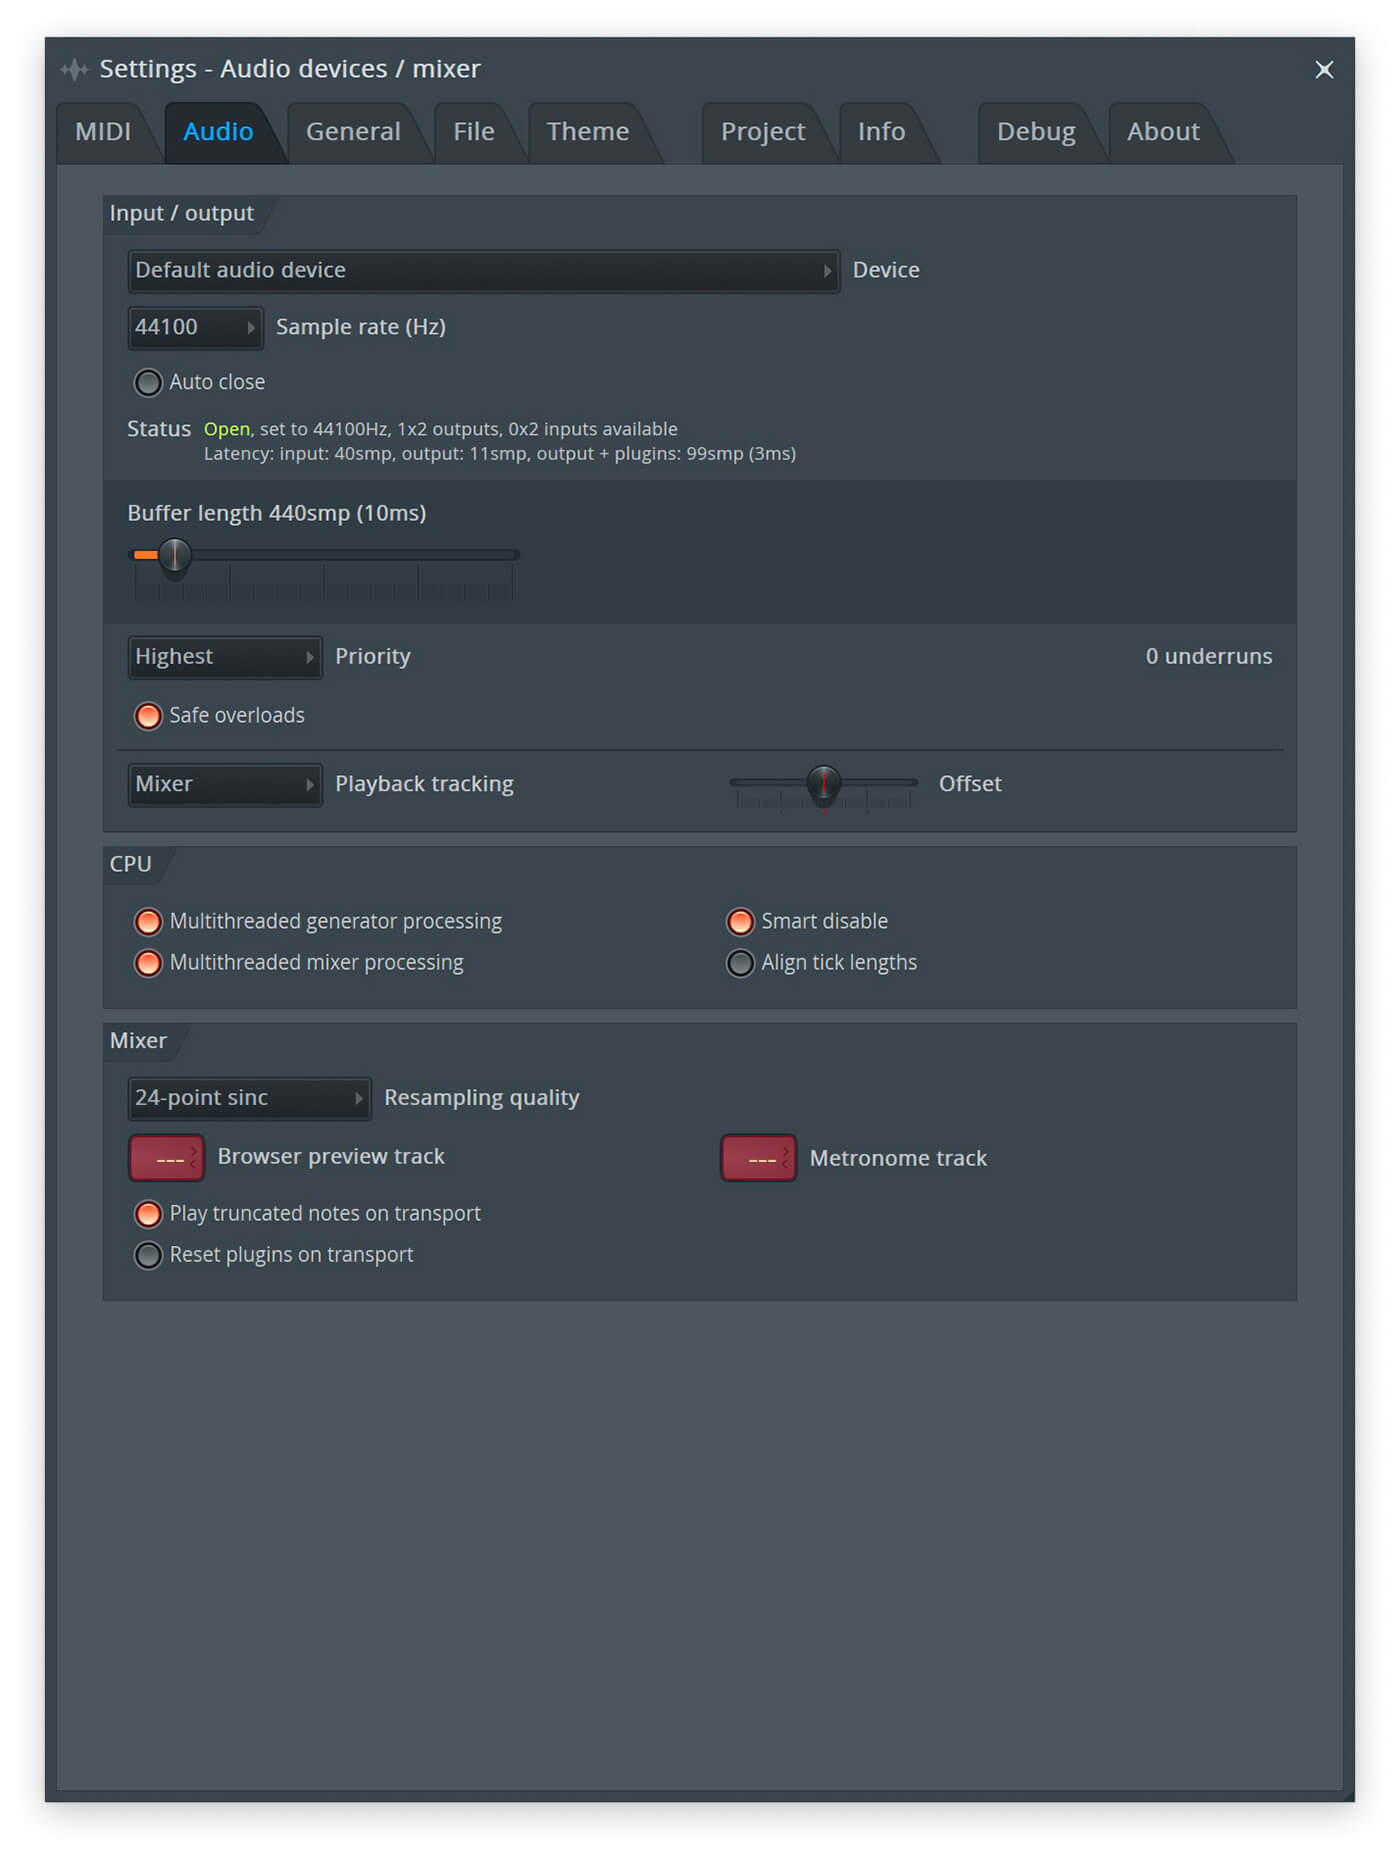
In truth, there are few reasons why you’d ever need to lower the number of cores and threads your DAW has access to – maybe you really need to run a power-hungry video app at the same time – but it’s worth a visit to your DAW’s preferences to check it’s using the maximum amount of hardware available to it.
Despite modern computers being much faster than those of even a decade ago, it’s still a good rule of thumb to only run the apps you absolutely need, to ensure they receive maximum resources. Heavy apps like games or Final Cut Pro running in the background will sap power and steal RAM from your DAW, so keep it lean.

Latency is still a thing
As powerful as computers are, there’s still the issue of latency to contend with – the gap between singing or playing a guitar, for example, and hearing the result back through your speakers or headphones. It’s compounded by the fact that we assume we can leave a project open with hundreds of live insert effects running and just carry on, but that loads up the system in a way that steals CPU cycles needed for low-latency processing.
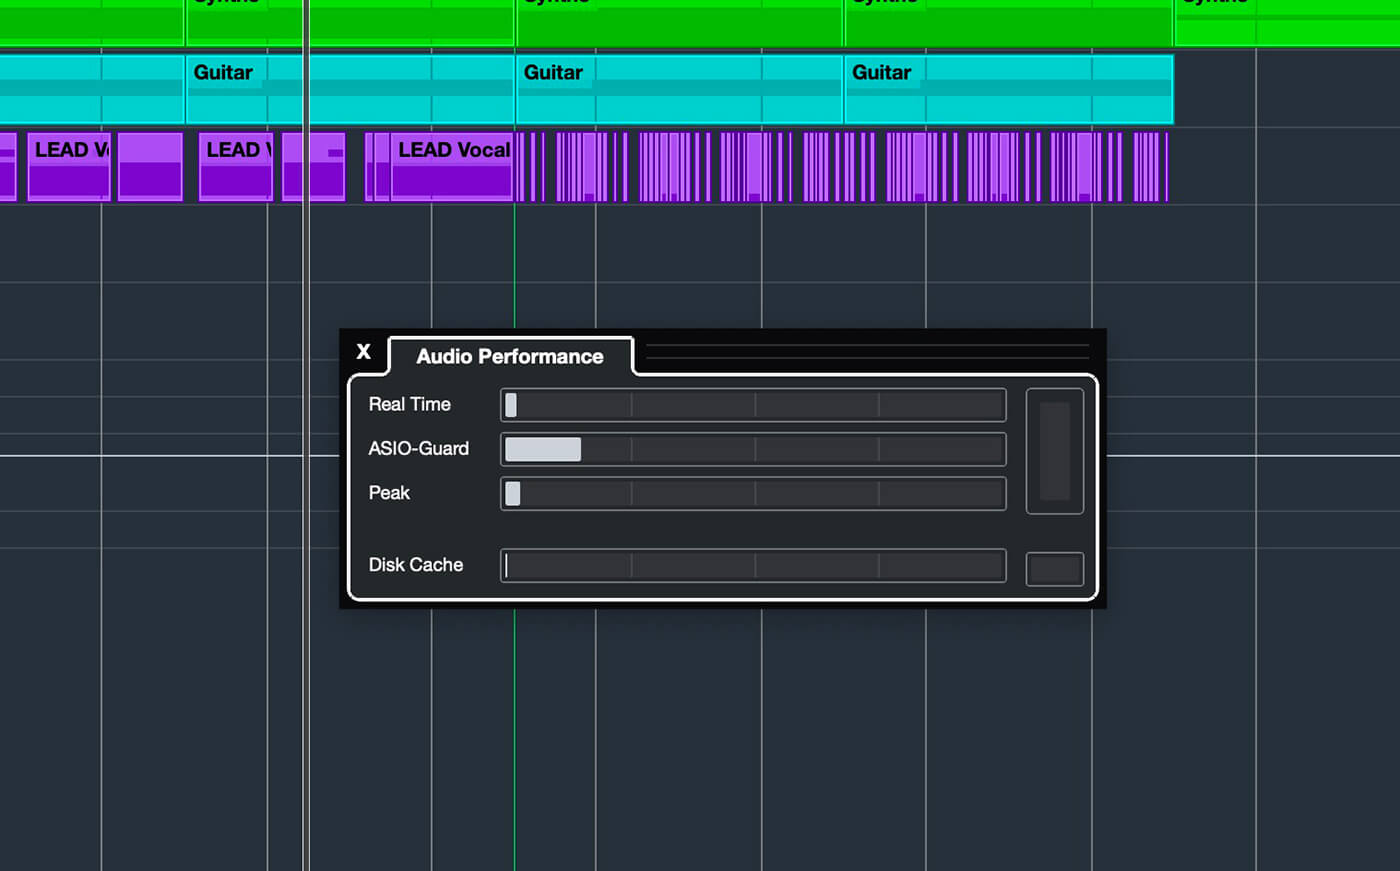
DAW developers have come up with some clever ways of getting around this. In Cubase for example, Steinberg uses ASIO Guard, which pre-processes all channels and VST instruments that don’t need to be calculated in real-time, freeing up resources for you to use smaller buffer sizes. In Logic Pro, multithreading can be assigned differently to live and playback tracks, again to prioritise lower latency settings.

In any DAW’s preferences, you can set your buffer size manually; as low as 32 samples for super quick processing, (virtually no latency but high CPU usage) and as high as 1,024 samples for less system load but more latency. When recording live – especially through plugin effects – you want the signal to be fed back to you with as short a delay as possible, and ideally none at all, otherwise the experience is disconcerting. But this requires more processing to be done by your computer
Typically, you’ll switch to a lower buffer setting when tracking and a higher value when mixing, at which time live input is less of a priority. Remember that you can always freeze tracks to temporarily remove the processor load of their instruments and effects, again freeing up power for smaller buffer sizes. Audio tracks that have been frozen require minimal power to play back since their effects have been ‘glued’ down. You can unfreeze them to make edits to their effects, at which point they start to consume more CPU cycles again.

Practice good housekeeping
When it comes to general DAW performance, some things never change and there are general rules to keep things running as best as possible.
Be mindful of storing and sending files on cloud services. If they’re in the cloud, you can still use them and import them, but loading times will be much slower than if they are directly on your hard drive. Storing project-critical samples and recordings on your boot drive or a connected SSD (solid state) drive will ensure the best possible read and write speeds and hence overall performance.
Keeping project folders properly organised, as opposed to having files scattered all over the place, will minimise the risk of crucial data getting lost or deleted by accident.
Even something as simple as disconnecting unnecessary peripherals can head off potential issues with drivers and resource usage, so unhook those scanners, printers and game controllers.
The good news: your computer is smarter than it used to be
For many years, the first stop on your DAW-tweaking journey would be to dive into macOS or Windows’ systems and start changing the way they handle your DAW’s performance. This is, for the most part, no longer necessary or even possible.
Long gone are the days when you could manually choose RAM allocation on the Mac, or prioritise one app’s performance over others. Now, your system handles everything automatically and dynamically. In the case of Apple’s M-series Macs, this even extends to the unified memory that’s shared between all the system’s components.
But even if you are on a newer machine, and especially if you are on an older one, the advice we’ve set out still holds true. A lean, mean system that’s running only what you need, and where your data is properly organised, will give you the best possible DAW experience. Of course if you do have the option of upgrading components or adding RAM (we’re looking at Windows users here, Macs are barely user-upgradeable) then that’s another weapon in your arsenal. But even if that’s not on the cards, there’s plenty you can do to ensure your system is performing at its best.